Tips for Taking your Coloring Book Techniques to the Next Level

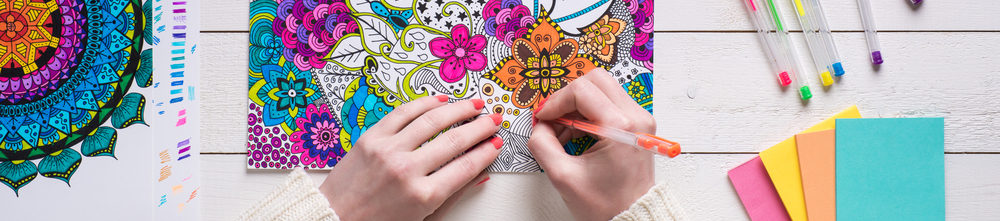
Coloring books may begin as a fun and engaging way to explore the wonderful world of hues and tones. Coloring and coloring books are also a great way to introduce stress-relieving balance and culture into an otherwise “nose-to-the-grindstone” lifestyle that many of us face today.
It is importation to become well familiarized with the concepts of laying down even strokes and filling in spaces evenly and consistently before beginning to practice the even more technical aspects of coloring books.
Step 1 Meeting Old Friends
 Nice to meet ya’ – It’s our old friend from preschool years the chubby crayon and aromatic colored pencil. Don’t those smells just take you back to better times? Getting familiar with your crayons and pencils is not only more cost-effective than splashing markers and pens around, but far more versatile and practical as well.
You can find colored pencils available at a very budget level, though some of the really cheap brands are somewhat limited in their functionality.
You probably have a whole set of colored pencils scattered about the kitchen drawers, garage, under the car seats and in the old toy box in Mom’s attic, you can begin with those or for a smoother and more satisfying results, treat yourself with a new pack of coloring pencils.
The difference of the prices are usually related to the number of pencils per pack. There are smaller 50 – 72 pencils packs, and you may find at Amazon 160 pencils bundles as well. In our opinion the 72 per pack will be exactly what a colorist needs. A wider range of tones and shades can be archived with proper technique. Check below which pencil packs meet your needs:
Once you’ve selected a good coloring book, gather the most suitable colored pencils or crayons at your disposal and move on to Step 2.
Step 2 Prepare for the Event
 Maybe you haven’t done this since grade school, so taking the time to slowly approach your task will make all the differences in your latest coloring works. Begin with sitting down somewhere comfortable, and situating your hand and wrist for free comfortable movement.
The way you hold your pencil is going to make all the difference in the colors released from the tip of your pencil or crayon. As you can imagine, the strength delivered at the beginning of your work may be different from the heavy tones and strokes you lay down after 45 minutes of coloring. Preparing to be comfortable and consistent in the long haul will allow your final production to be a work of art.
As you begin to work on the first few pages of coloring, pay extra attention to the way your fingers are gripping the crayon and pencil and notice when your hand tires and fingers begin to grip hard. Keeping your grip light and gentle leads to uniform work and fewer cramps and pains along the way. With this in mind to you will want to look at each work as a marathon to be completed as energy stores allow for excellence, rather than a rushed sprint.
Then try holding your pencil at different distances from the tip and see the differences in the strokes you can produce. You will notice holding your pencils close to the tips will provide more control over your lines and strokes. A further away grip will allow you to create some very broad strokes with less control but far greater mobility. This is good for layering one tone on another.
Master the pencil strokes and get the best coloring results you could wish for! Here is a tutorial clip which will give you smart tips how to use your colored pencils, to get the best results when coloring. See the shading, blending and enhancing techniques inside:
Step 3 Achieving Excellent Colors
It is the bright and impressive color schemes that people want they begin using markers and pens for their depictions. When using pencils, it takes time and technique to produce bold and impressive colors. The first thing many beginners will find is that the back and forth strokes used to fill in spaces are hard to hide and rob from the textures of the subjects they depict.
Then one area will meet up against another area in ways that are awkward and this creates patchy awkward looking segments. Luckily there are some ways to avoid this.
 Change Directions Often if you could look at the surface of your paper on a microscopic scale, you will notice the surface is not as smooth as you may have thought. When you color in a single direction, only one side of the multi angled surfaces are being colored. If you only move in two directions, the grainy textures only colored on two sides.
See the change in the line directions in the panda drawing. The changes in the pencil’s strokes direction gave the fur a realistic texture.
Color in circles, “8”’s or other patterns, one way to be sure to hit all sides of your textured surfaces is to color in small patterns that overlap and touch the textured paper on all sides. As you may notice the texture of the paper is gradually worn down as the pencils are passed over so finding the most efficient way to color all sides is a good idea. Look for patterns that help you fill in the subjects you are coloring.
For example, rough textures can be described with star patterns while smoother textures could use fluffy circles and hearts or even “8’s”. This will also allow you to join up sections and areas of coloring and layer on extra shades for deeper shadowed sections more easily. Furthermore, if you learn to gently twirl your pencil tip as make your marks, you will maintain a sharp point and fresh edge on your crayon or pencil.
Cross-hatching – Coloring in many directions is one way to address the textured papers from all sides. But another way to accomplish this task is with cross-hatching, which is simply filling and entire area with parallel lines. After the first layer has been laid out as straight and non-intersecting as humanly possible, the second layer is laid out perpendicular to the first. Subsequent layers can be added diagonally, thus maximizing the textures and providing a very even spread across the page.
Step 4 Bolder Colors
 For those who are looking to really get the boldest of the bold colors, there are some more points to consider. When we see the bright yellows and reds provided from paints and markers, we see the capacity of the paper to absorb color. Color pencils and crayons work differently. Small particles are rubbed off the crayons and pencils by the rough paper and this is what makes a mark.
Thus, the greater the “teeth” and the dynamics of the tool used the better the colors can be absorbed. You may actually find the most vivid and impressive colors are made by regular quality crayons working softly on the typical coloring book’s rough paper.
Step 5 Putting it all Together
When you sit down to work on a project take a moment to break the larger objectives into smaller objectives and faces these as you see fit. Systematic work keeps the page and production neat and orderly.
Right-handed people might find it easier to work from the top left hand corner to the lower right hand and left-handed folks, vice versa. Other ideas are to begin with the darker elements, lighter elements or background before moving on. Of course, your personal style will dictate what the best process is for you and this is part of what makes coloring books the joy they are.
See this short video which explains the techniques and different types of paper and pencils (water, wax, oil) and how the variety of results you can expect to achieve with each of them. Even one or two tips from this video will upgrade your coloring level and the control of mediums you are using.
We hope you enjoyed this article, you are welcome to find in the sidebar the right coloring book category which you would like to begin with. We wish you happy coloring moments.